13-May-2008
8200022500
 ) > [All Programs] or [Programs] > [Canon Utilities] > [ZoomBrowser EX] and select [ZoomBrowser EX] to start ZoomBrowser EX.
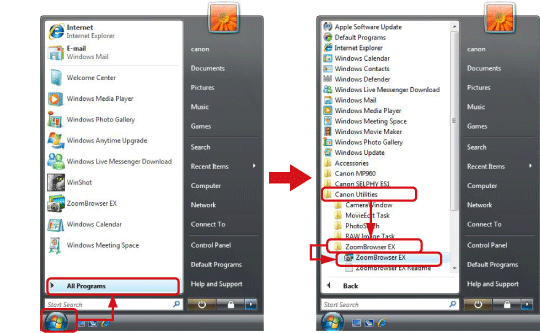
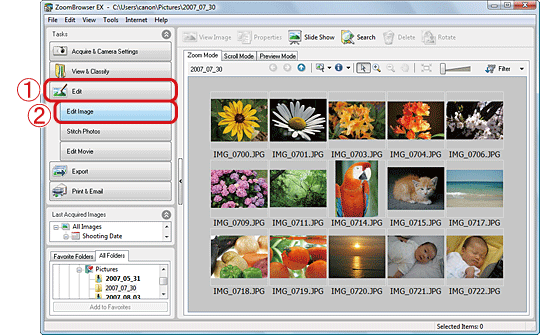
 Click [Edit].
 Then click [Edit Image].
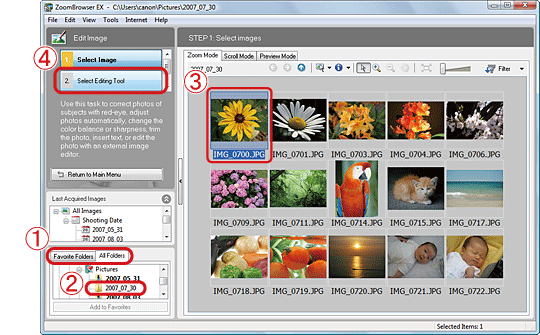
 Click either the [Favorite Folders] tab or the [All Folders] tab.
 Select the folder that contains the images to trim (Usually images are saved in the [Pictures] or [My Pictures]).
 Click the image to trim.
 Click [Select Editing Tool].
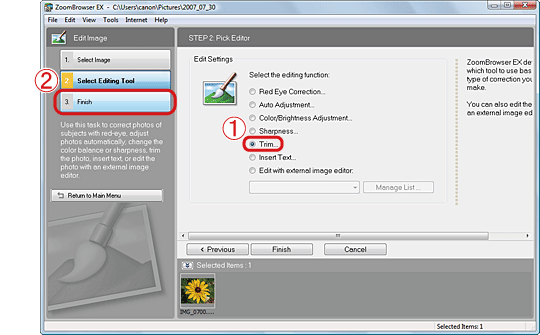
 Select [Trim].
 Then click [Finish].
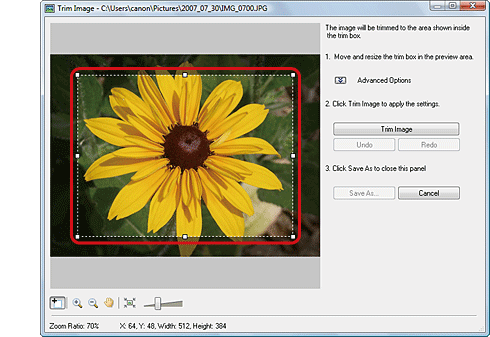
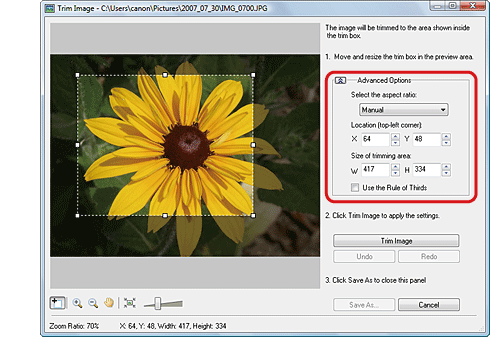
 ) on the trim area and drag it while holding the left mouse button down.
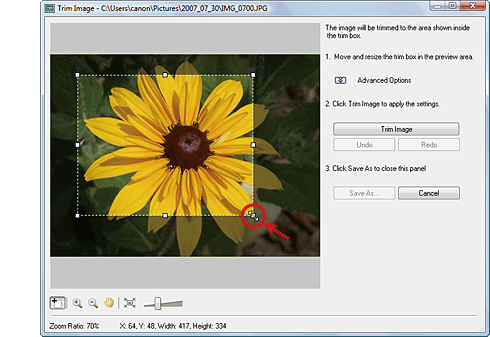
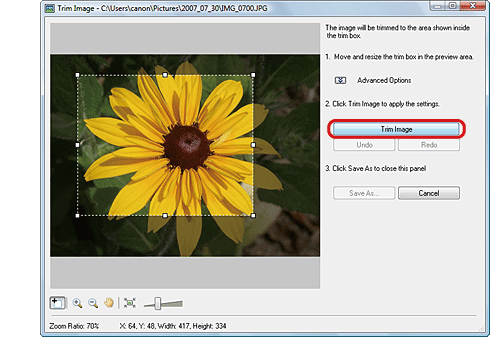
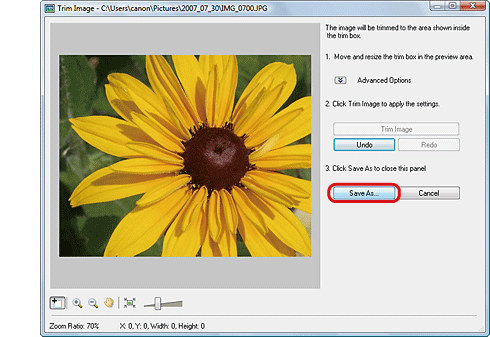
 Check the destination where the file will be saved.
 Click (
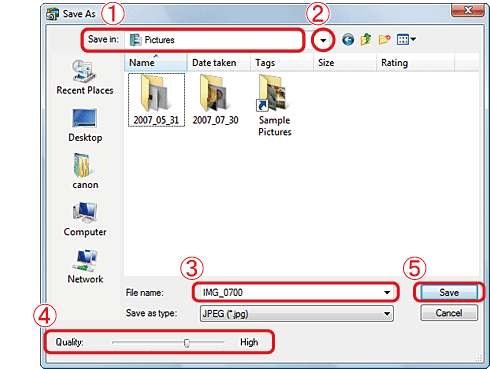
 ) to change the destination and select a new one.
 Name the file (If you don't change the file name, the original image will be overwritten).
 Set the image quality as desired.
 Click [Save] to save the image.